Capturing the Milky Way from a Jamaican Backyard
Unaware to many, there is a lot that happens above us when night falls. For many who live in urban areas, there is a somewhat unpleasant phenomenon that prevents us from being aware and possibly enjoining the night sky. That phenomenon is light pollution.
Light pollution as defined by Oxford, “is the brightening of the night sky caused by street lights and other man-made sources, which has a disruptive effect on natural cycles and inhibits the observation of stars and planets”. So all the bright lights emitted from streetlights and buildings radiate upwards even though they might be pointing down, preventing or limiting us from seeing night sky objects like the stars.
The Milky Way and How to Locate It
The Milky Way is a barred spiral galaxy that is said to be about 100,000 light-years wide. Man, that’s huge! Imagine travelling at the speed of light and you would still not complete the trip in your lifetime. Just wow!
The Milky Way has a core with two main spirals, with other minor spirals and spurs extending from its core. It is on one of these spurs that earth and our very own solar system resides. When we speak of capturing the Milky Way, it is the core of this massive galaxy that is being referred to.
Under the right conditions (with little to no light pollution), you are able to see the Milky Way’s core and part of the main spiral with the naked eye as a faint band of light stretching across the night sky. The core is visible during the months of March and October in the Northern Hemisphere where Jamaica sits. This period is generally referred to as the Milky Way season. April to July is considered the prime period to capture the core. The core rises above the horizon in a south-easterly direction and sets in a south-westerly direction.
Once you have spent some time capturing the milky way and have a general idea of the time it rises above the horizon, you will be able to spot the core with the naked eye quite easily. However, it doesn’t have to be a guessing game. There are tools that can aid you in identifying the Milky Way in preparation to shoot it.
The first tool I’d recommend is Stellarium, which is a free and open-source planetarium that runs on Windows, Linux and macOS. Stellarium provides you with a 3D representation of the night’s sky with stars, identified constellations, satellites, planets and yes, the Milky Way among others. Fire up the application on your PC and start exploring and learning what awesome things are above us.

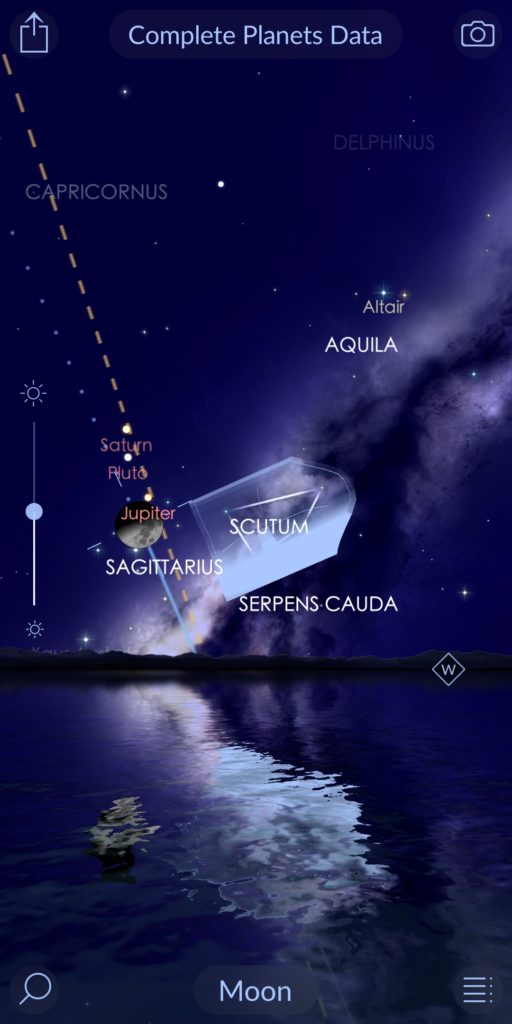
Star Walk 2 Screenshot
Another planetarium tool I can recommend, this time for mobile devices, is Star Walk 2. I use the free version on my Android phone, which I got from the Google Play Store. You can find the equivalent version in the Apple App Store. If you want to have an ad-free experience and get more detailed features you have the option of upgrading to the paid version.
There are many other options out there but these two are options I have used and like. Feel free to explore, research and test other options that might be out there and leave a comment below if you find others that you would recommend.
How I capture the Milky Way from my backyard
In preparing my Milky Way captures, I utilize a mobile app that offers a different set of functionality than the two named above. This tool, unlike the others, is a paid application called PhotoPills. It offers a complete set of features that every photographer from every genre of photography can utilize. From seeing a visual of how the sun will travel across the sky on a particular day, to what phase the moon will be in, to pre-visualization of a shot using augmented reality.
I will start off the planning by checking to see what time the Milky Way will rise above the horizon. So I’ll check the Planner section of Photopills, which will tell me the rise and set times of the core as well as provide me with a map that I can interact with. This map will allow me to see the path the core will travel.
I can go a step further by switching to augmented reality (AR) mode to view how the core will travel in a particular scene. AR mode can also help you with pre-visualizing compositions, by overlaying the Milky Way in a scene as shown in the image below.


Next, I determine the shutter speed I’ll need to shoot at based on the focal length of the lens I will be using. Due to the earth’s rotation too long of a shutter will result in star trailing. For this I go to the Spot Stars section and enter the camera model, focal length and aperture I’ll be shooting at. The NPF and 500 rule times are given. For my camera, the 500 rule (dividing 500 by the focal length, 500/17) does not work, which is expected because this rule was created in the days of film. Digital cameras present other variables which the NPF rule has taken into consideration.
With the knowledge of when and where the Milky Way will be visible, an idea of the composition I want to take and the shutter speed I need to shoot at, I go about executing the capturing of the Milky Way with the tools below:
Nikon D750 Camera – This camera is my daily driver and has served me well over the years. Its high iso performance is very good.
Tamron 17-35mm lens – I use this lens when capturing the Milky Way while including the landscape in the frame. It’s f2.8 aperture lets in quite a bit of light
Sigma 85mm lens – This lens is used for tight or close-up shots of the Milky Way core. The f1.4 aperture lets in a lot more light than the one above allowing me the flexibility to use lower ISOs or shorter shutter speeds
Neewer carbon fiber tripod – Night time photography will require longer shutter speeds to allow the camera to capture enough light. Hand holding won’t cut it as that would introduce shake making the images blurry. So a tripod sturdy enough to support the weight of the camera and lens combo being attached is required.
LumiLoupe 10x Magnifier – This magnifier comes in quite handy when focusing to get the stars sharp. I switch over to live view on the camera and zoom in to one of the brighter stars. The lens is set to manual focus and then I place the Magnifier on the LCD screen. While looking through the magnifier, I rack the focus ring on the lens back and forth, until the star is at its smallest indicating proper focus.
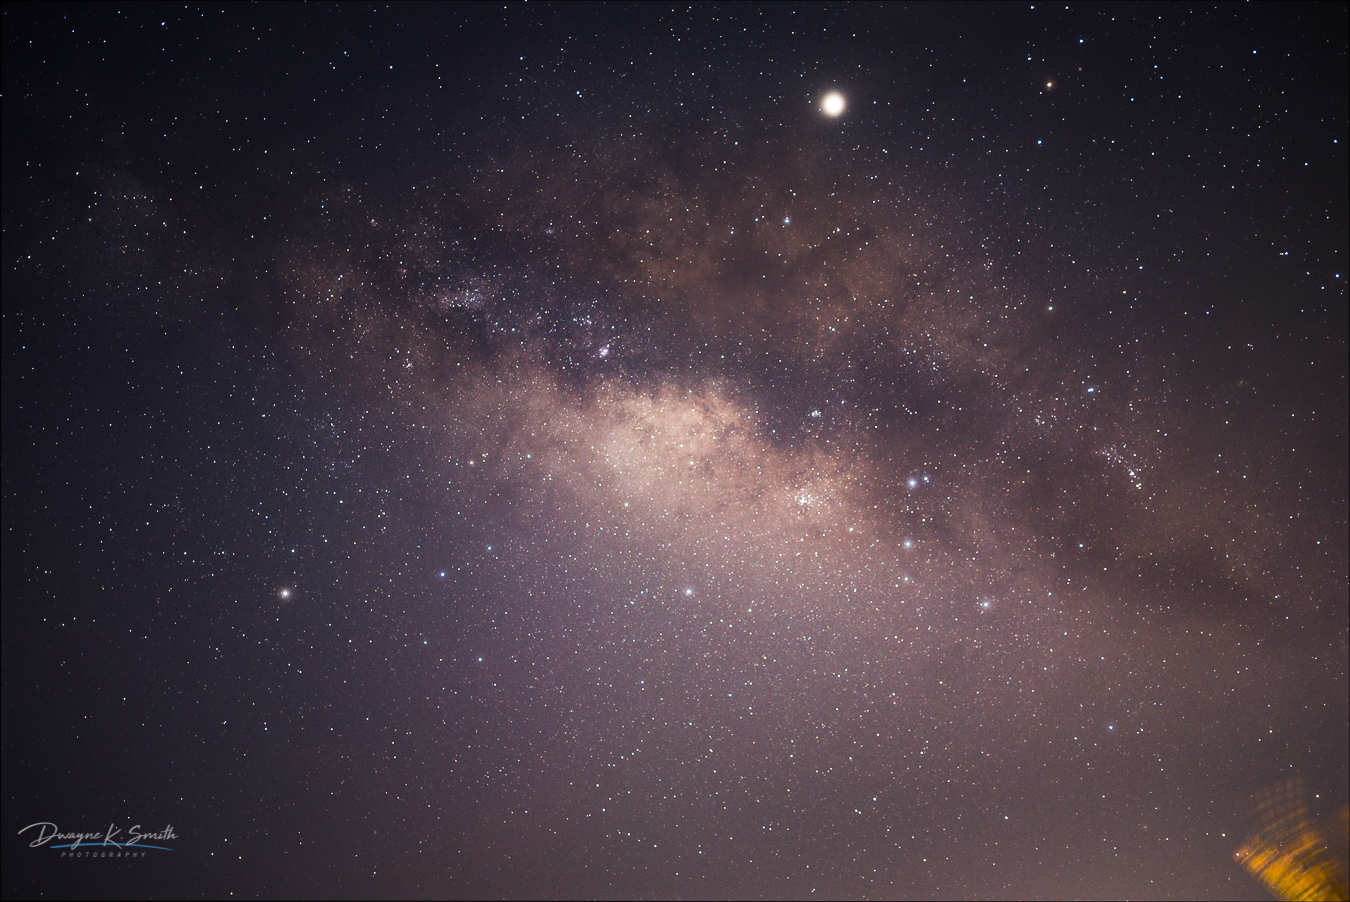
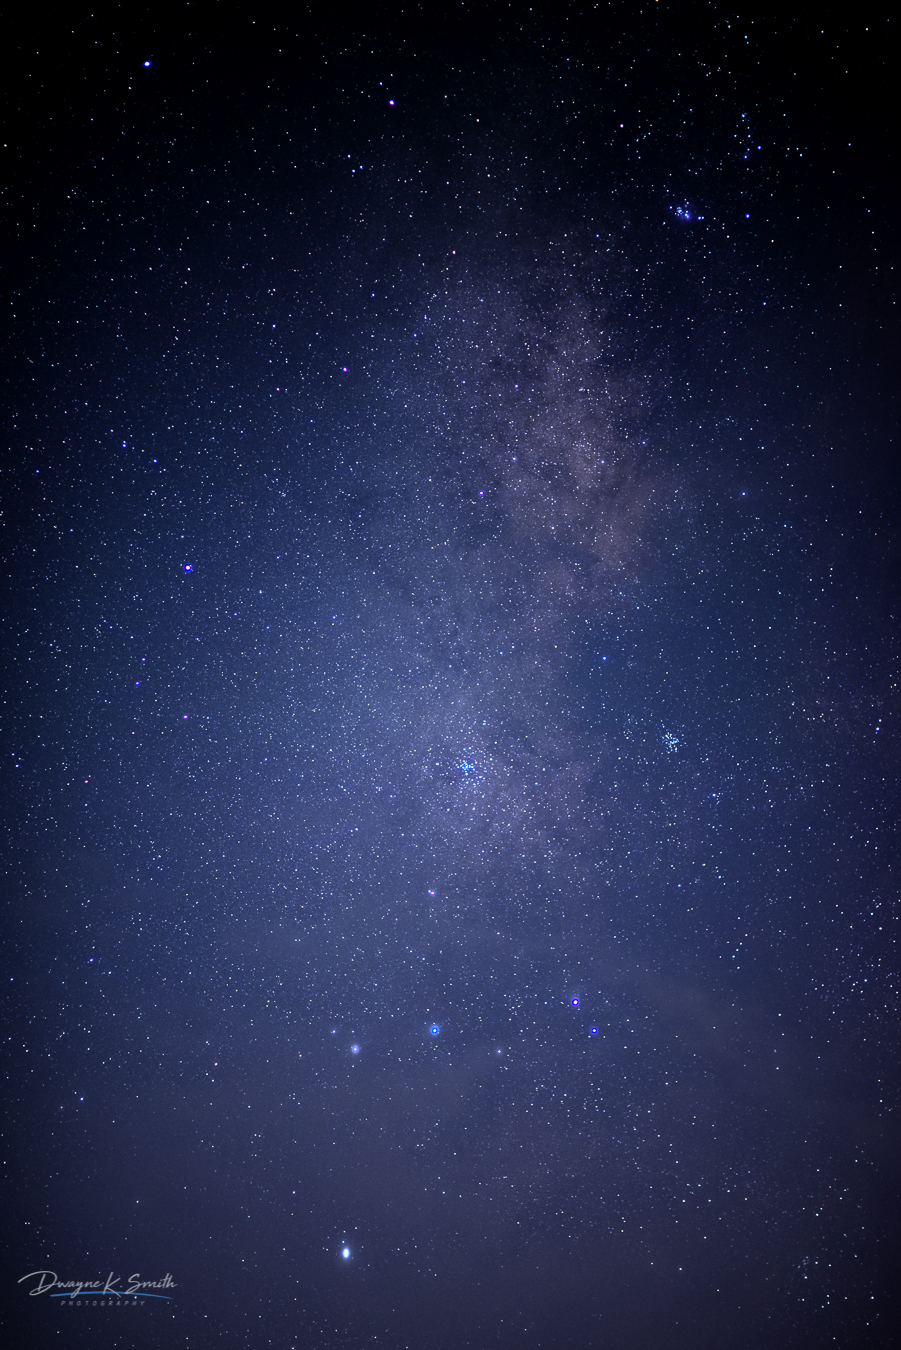
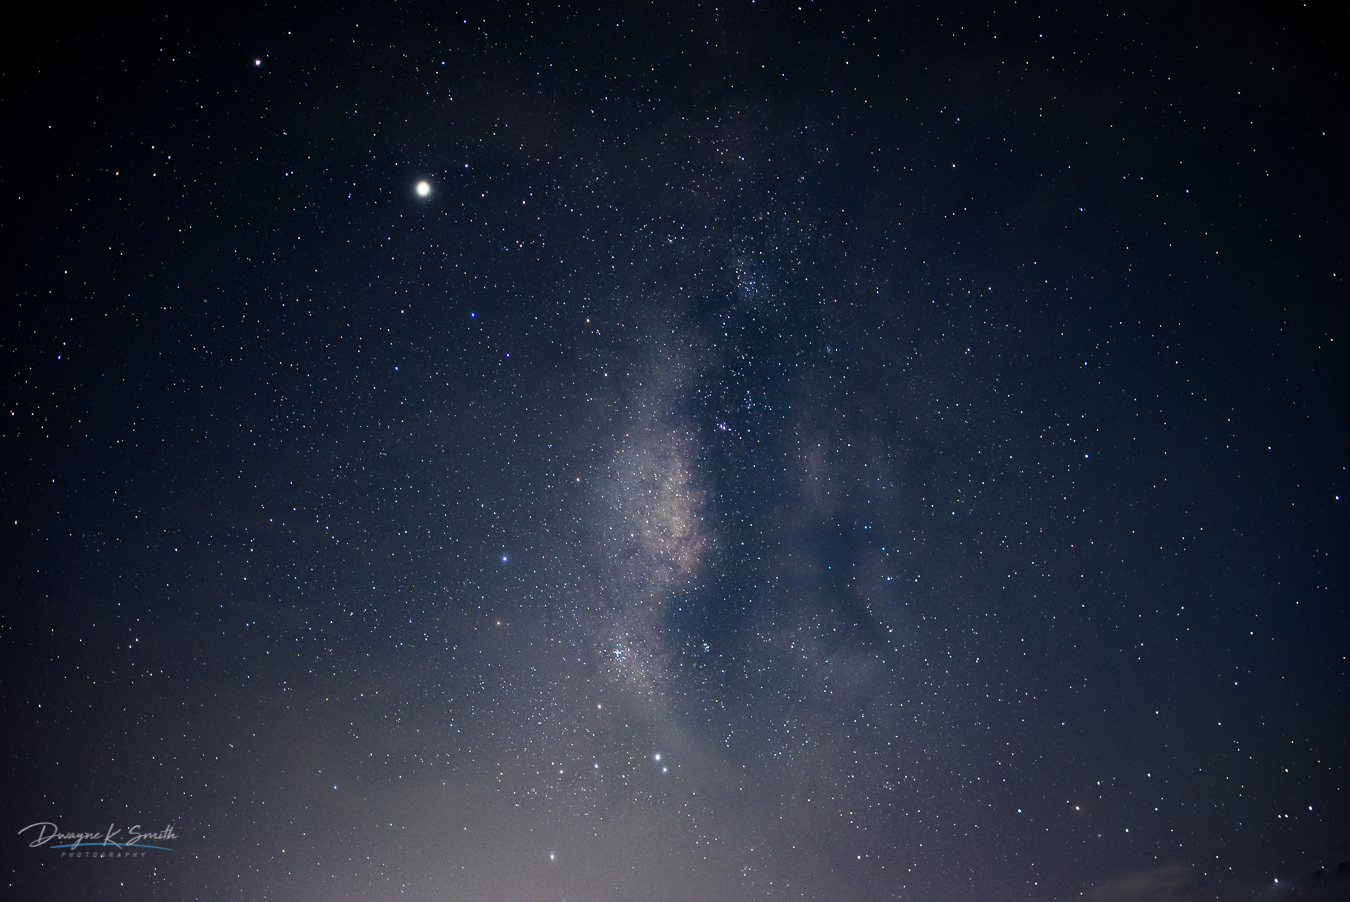
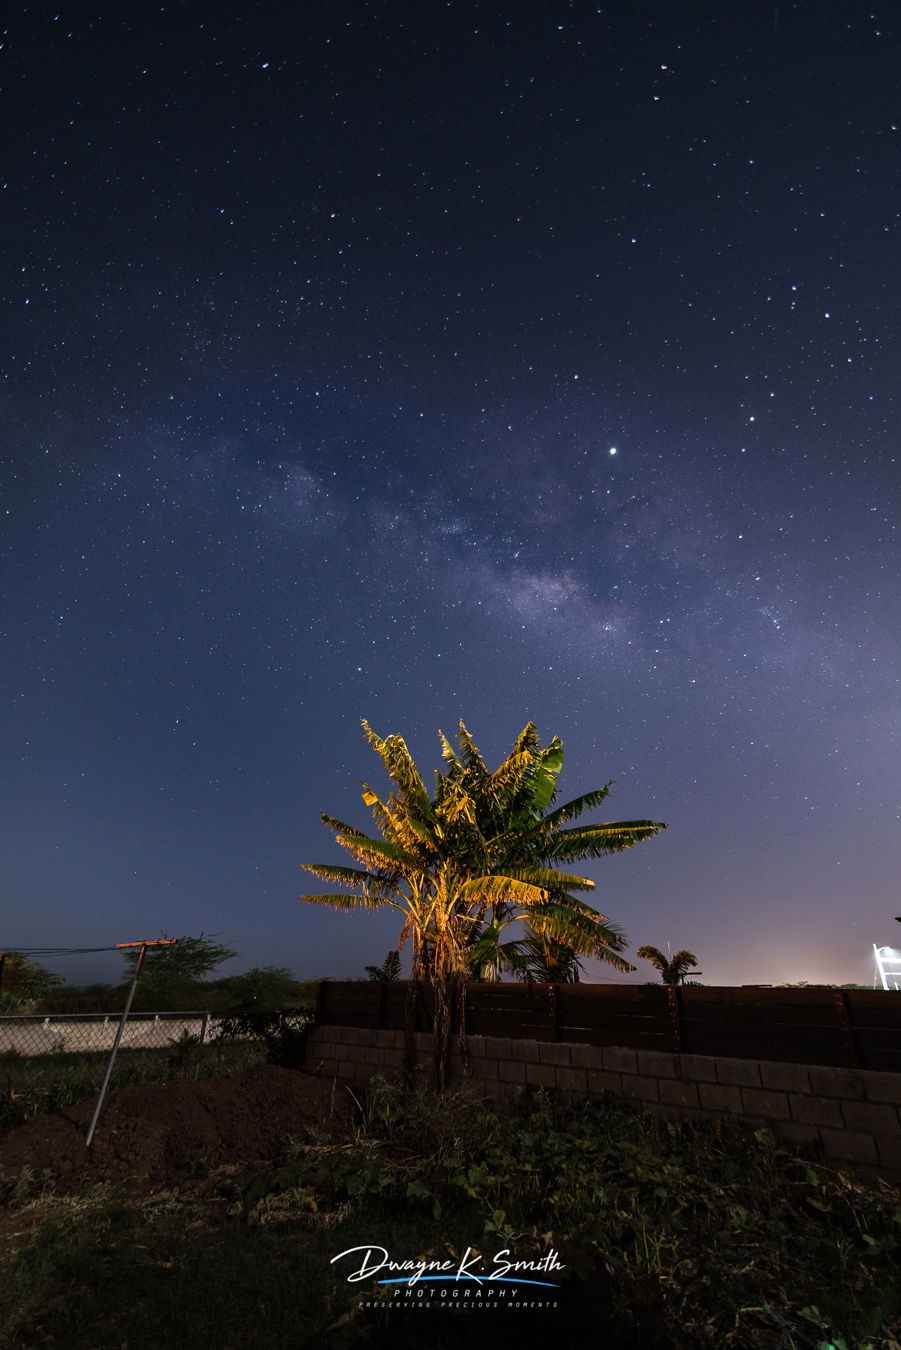
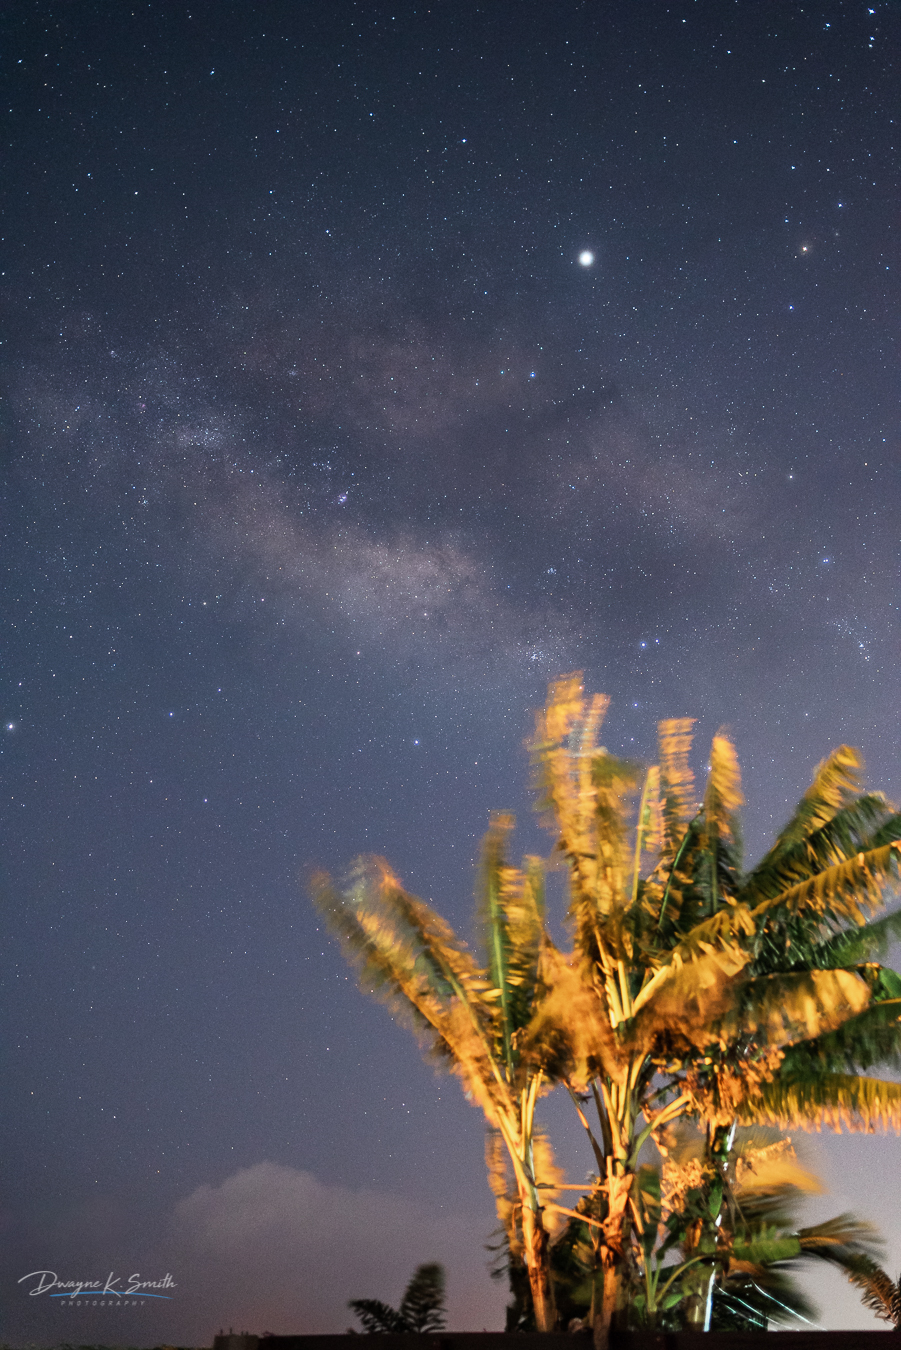
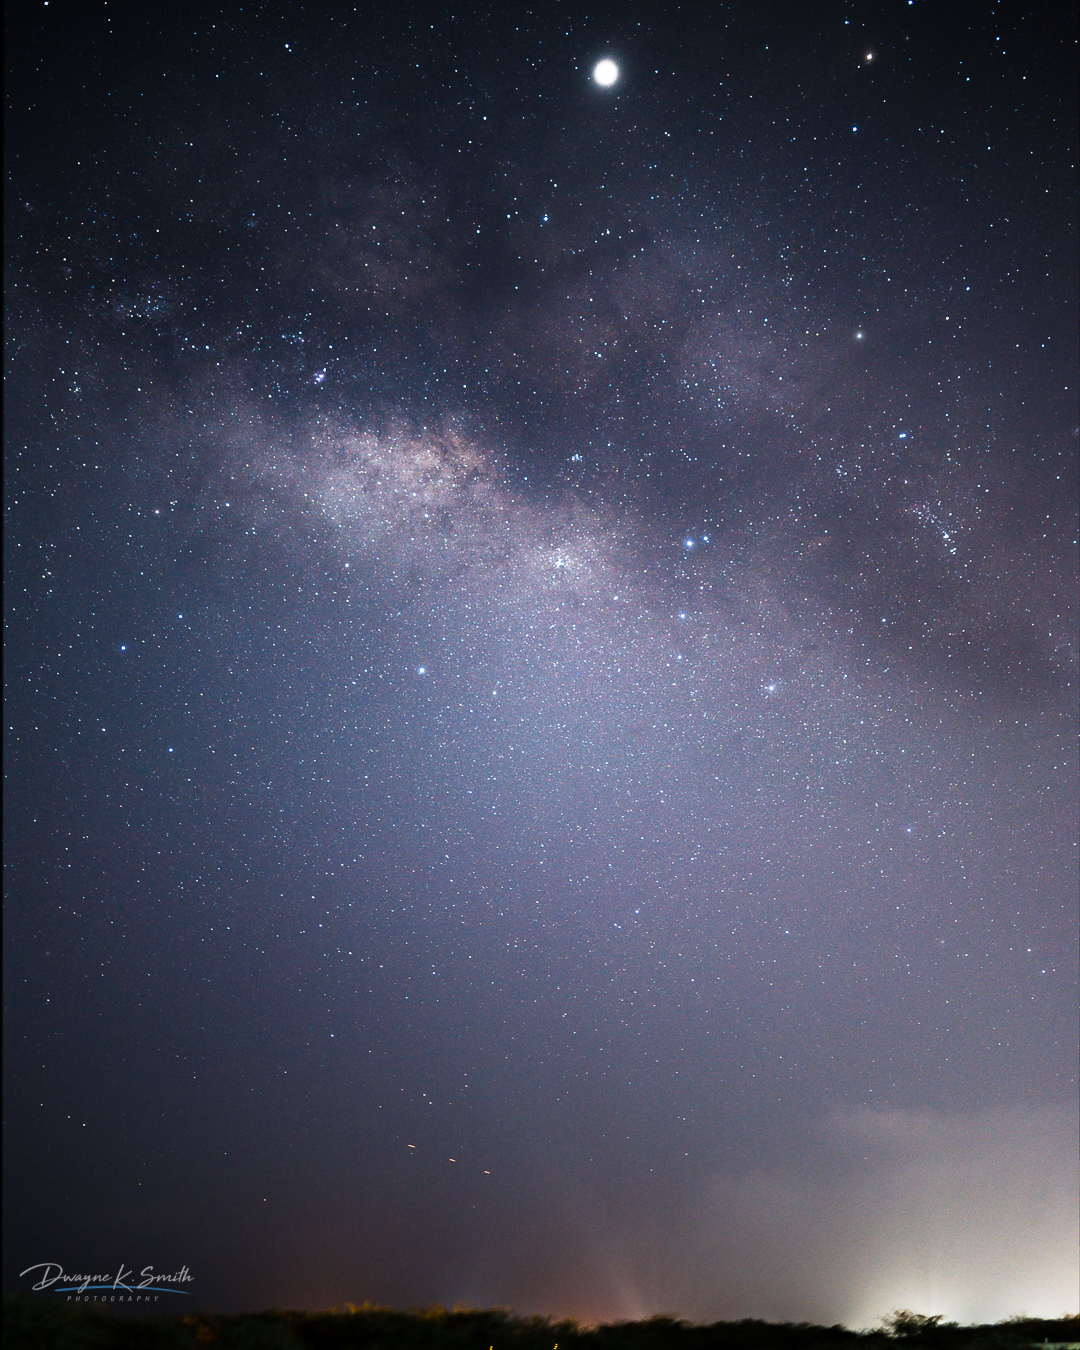
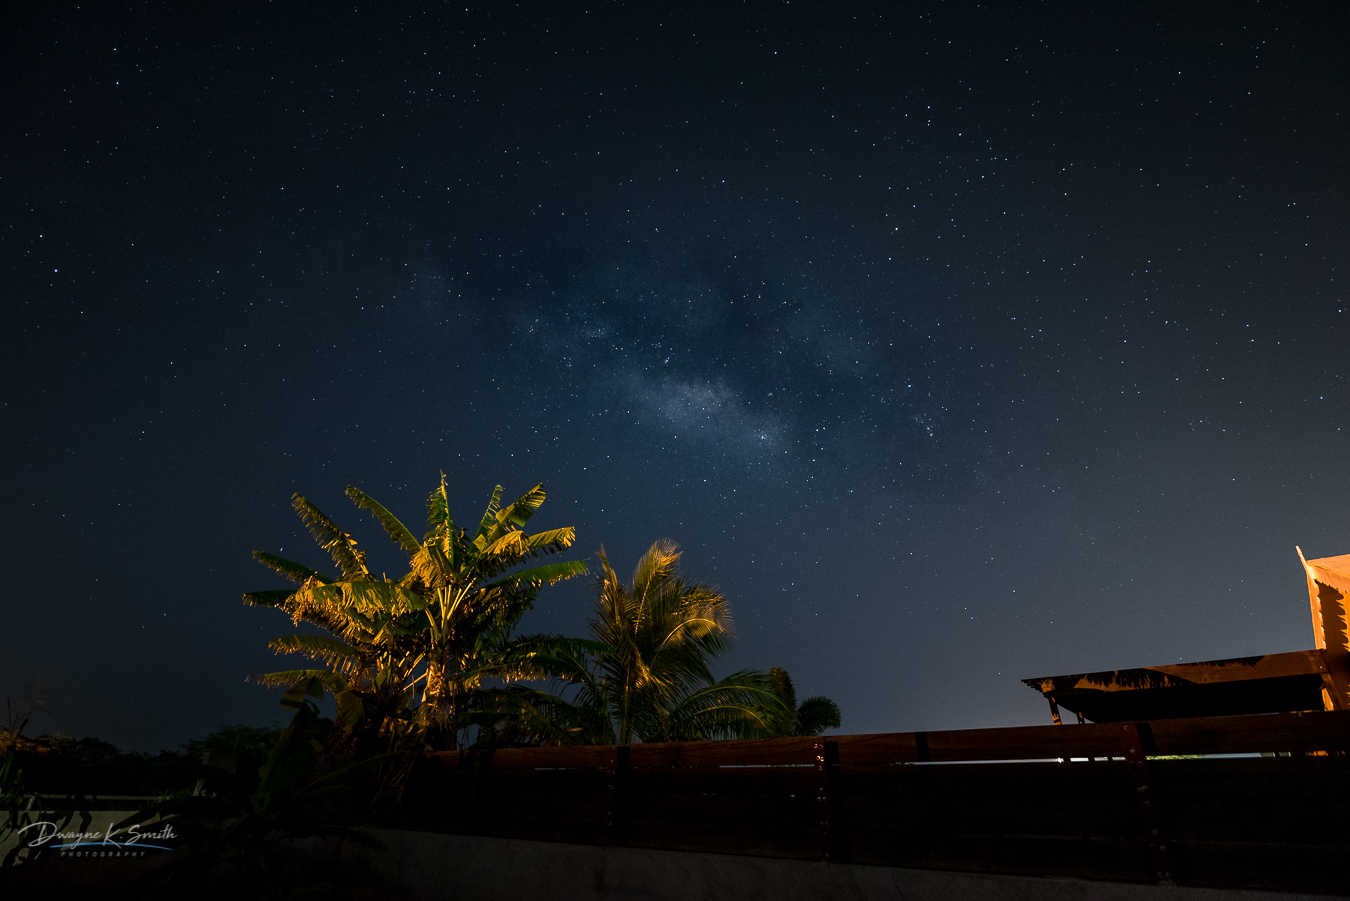
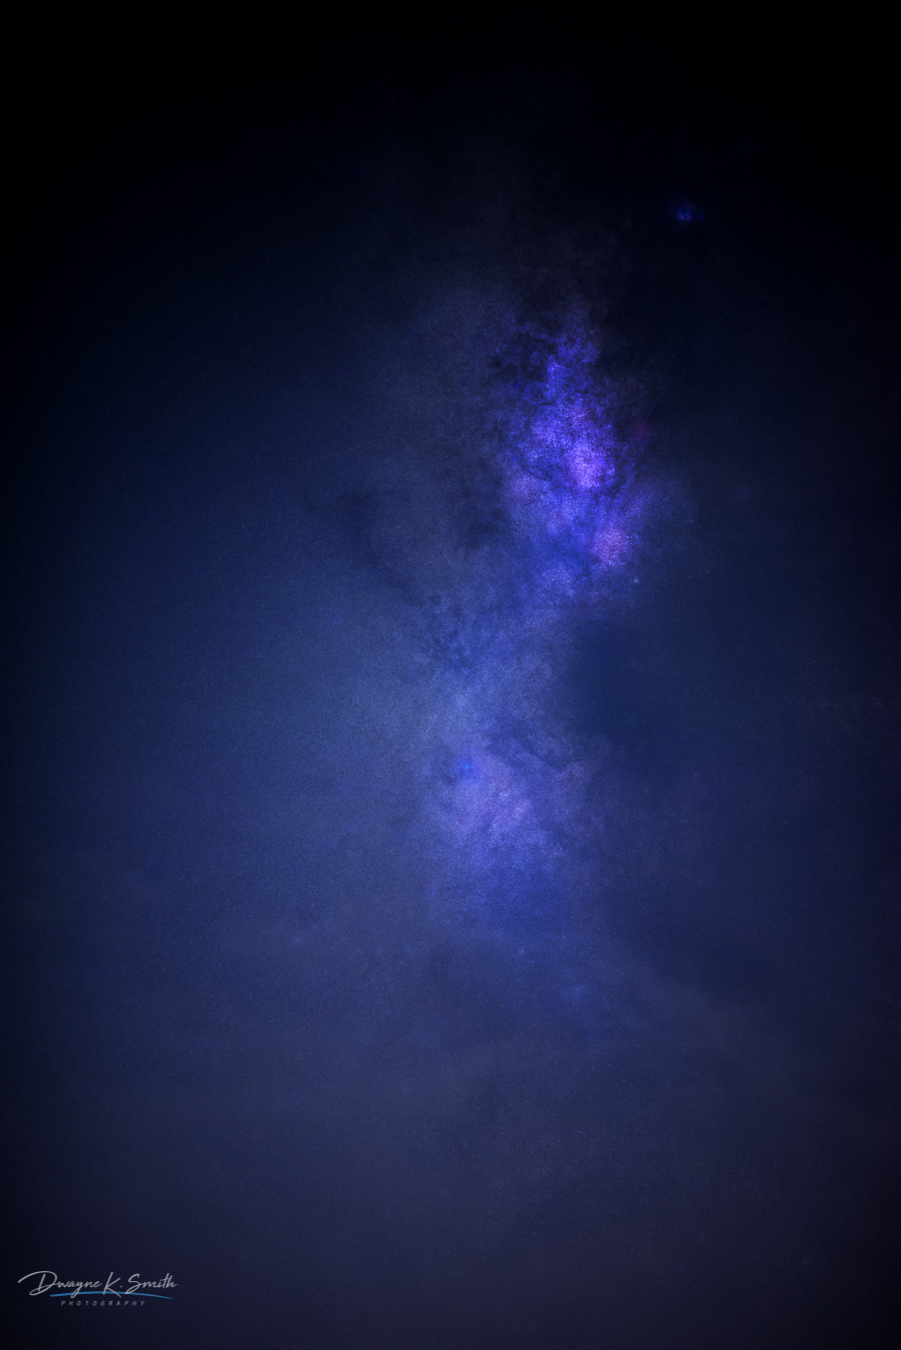
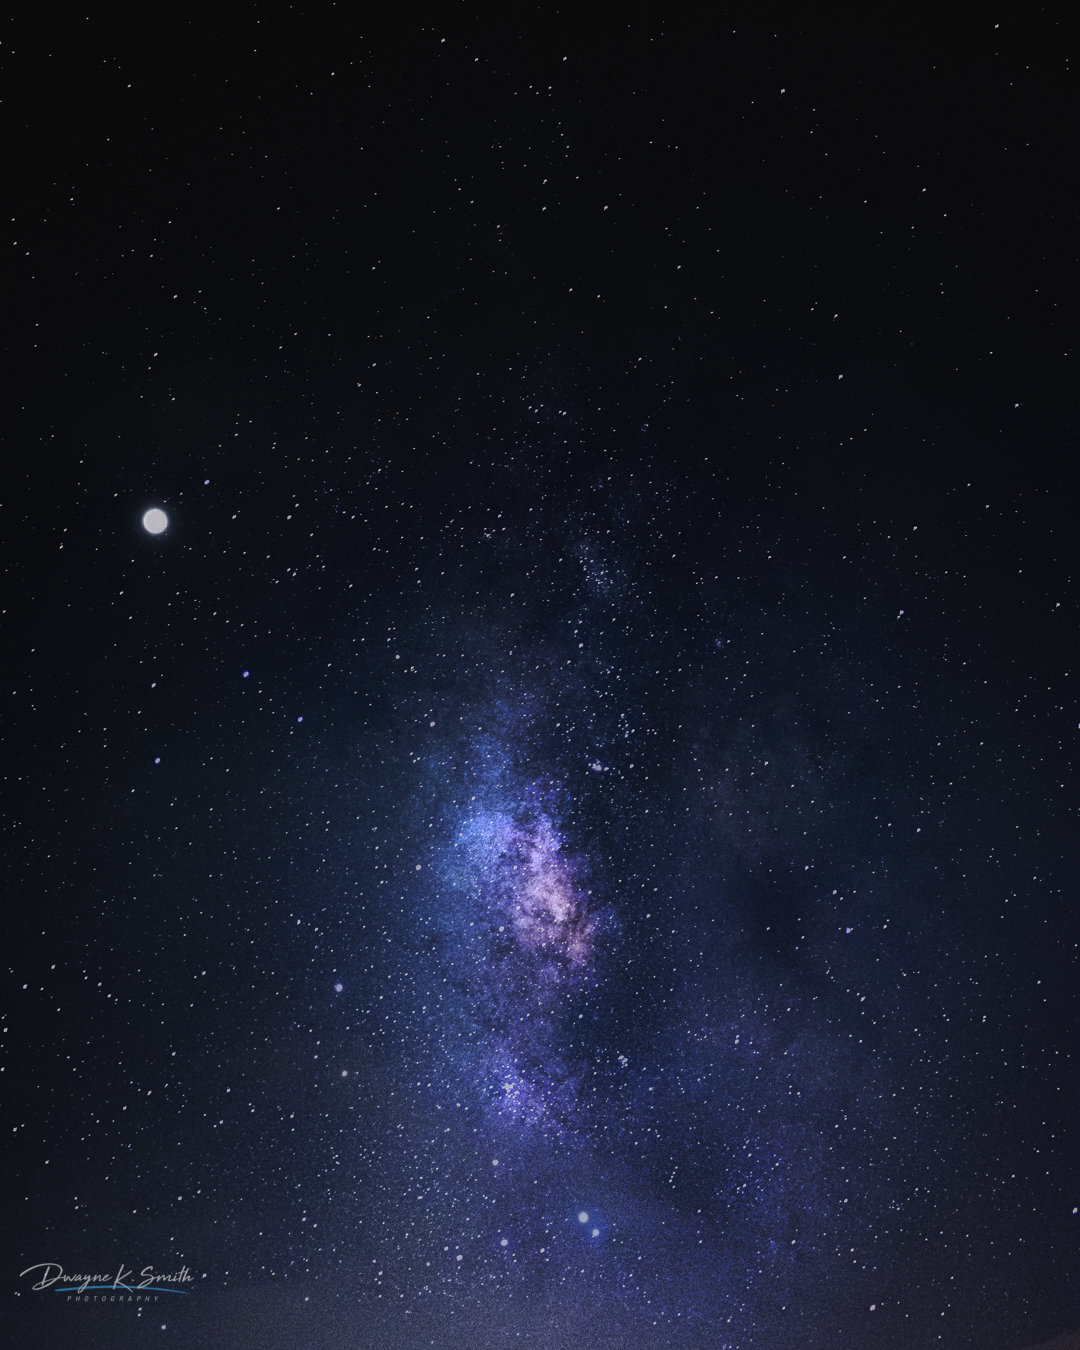
Here are some samples images I have captured of the Milky Way from my backyard. I do hope to get much better imagery of the Milky Way from my backyard in the future, so my next goal is to acquire light pollution filters. These filters will block emissions from street lights etc, that limit the amount of visible detail when capturing the Milky Way.


9 Comments
Very useful Dwayne especially demonstrating that this can actually be done from inside an urban setting. Good post.
Thank you very much Ian. You are most welcome.
lol, I’m lucky if I see the moon and 4 stars from st. catherine.
Well, it will all depend on where you are and how your house is positioned. I’m in St. Catherine too 😀
Well I am surrounded by street lights. Even with a recent power outage there seemed to still be a glow coming from somewhere. I will have to find a place in the country.
Ahhh I see. Yea find your spot
Expertly done. Not too long a read but informative with great suggestions of composition planning tools both free and paid giving people that are trying for the first time options and persons that have been at it a better way.
Thanks for the share
Hey thank you GT. Glad you approve.
Thanks Dwayne for posting this great advice. As a Jamaican local could you tell me how safe I could expect to be out alone between midnight to 0300hrs in the West of the island around Negril? I’m going to be out there for a week in May 2022 and will be bringing a mini scope and tracker to get some long exposures of the MW and its surrounding nebula?